Turning your garage floor into a durable, professional-looking surface is easier than ever with epoxy coatings. This guide will show you how to get the perfect epoxy garage floor. You’ll learn about the benefits of epoxy flooring, how to choose the right product, and how to apply it with precision.
Whether you’re a DIY fan or thinking about hiring a pro, this article has everything you need. It will help you take your garage to the next level.
Key Takeaways
- Epoxy garage floors offer superior durability, easy maintenance, and a sleek, professional appearance.
- Proper preparation of the concrete surface is crucial for a successful epoxy application.
- Selecting the right type of epoxy coating based on your needs and budget is essential.
- The application process involves cleaning, etching, and carefully mixing and applying the epoxy.
- Decorative options like color flakes or chips can add a unique touch to your epoxy garage floor.
Introduction to Epoxy Garage Floors
Epoxy flooring is a top pick for making garages look better and last longer. It’s made from two parts mixed together. This creates a shiny, smooth finish that makes any garage look great.
What is Epoxy Flooring?
Epoxy flooring is a strong, protective layer made from resin and hardener. It’s applied to concrete or other surfaces. This results in a glossy, durable finish that looks good.
Benefits of an Epoxy Garage Floor
Many people love the benefits of epoxy flooring in their garages. Some key advantages include:
- Increased durability: Epoxy coatings withstand wear, tear, and spills well, perfect for garages.
- Easy cleaning: The smooth, non-porous surface makes cleaning easy, saving time and effort.
- Professional appearance: Epoxy garage floors give garages a sleek, modern look, boosting your home’s value.
- Customizable options: Epoxy comes in many colors and can be decorated with flakes or chips, letting you personalize it.
Knowing about epoxy flooring and its benefits helps homeowners choose the right upgrade for their garage. It’s a durable and stylish option.
Preparing Your Garage for Epoxy Application
Getting your garage ready for epoxy is key to a lasting, professional finish. Before applying epoxy, your concrete floor must be clean, smooth, and ready. Let’s explore the important steps to prepare your garage for epoxy.
Cleaning the Concrete
Cleaning the concrete floor is the first step. You need to remove dirt, oil, grease, and other contaminants. Use a degreaser or floor scrubber to clean, then rinse well to remove any leftover residue.
Repairing Cracks and Damage
Next, check your floor for cracks, holes, or damage. These need fixing before epoxy to ensure a strong bond. Use concrete filler or patching compound to fix these areas, making the surface even.
Etching the Concrete
Etching the concrete helps the epoxy stick better. Use an acidic solution to roughen the surface. Follow the manufacturer’s guide for the best results.
Cleaning Up After Preparation
After cleaning, repairing, and etching, sweep and vacuum the floor. This removes dust and debris, preparing it for epoxy.
By carefully preparing your garage for epoxy, you’re setting up for a durable, attractive finish. This will change the look and feel of your space.
Choosing the Right Epoxy Product
Choosing the right epoxy for your garage floor is key to a lasting finish. Not all products are the same. We’ll look at the different types and what to consider when picking one.
Types of Epoxy Coatings
Epoxy garage floor coatings fall into three main types:
- Water-based Epoxy: These are eco-friendly, have low odor, and are easy to use. They’re great for homeowners who want something simple.
- Solvent-based Epoxy: These offer great durability and chemical resistance. They’re often used in commercial settings but have a stronger smell and need special application.
- 100% Solids Epoxy: This is the top choice for strength, chemical resistance, and long protection. It’s more expensive but gives the best results.
Factors to Consider When Selecting Epoxy
When picking the right epoxy for your epoxy garage floor, think about these:
- Coverage: Know your garage’s size and pick an epoxy that covers enough area for a full finish.
- Durability: Think about how much foot traffic, vehicle use, and chemicals your garage gets. Choose an epoxy that can handle it.
- Budget: Types of epoxy coatings vary in cost. Set a budget and find something that meets your needs and price range.
Knowing about the different types of epoxy coatings and what to consider helps you make a smart choice. You can turn your garage floor into a durable, professional-looking space that lasts.
Step-by-Step Guide to Applying Epoxy
Applying epoxy to your garage floor is a detailed process. It needs careful attention to get a durable and professional finish. We’ll cover the key steps of cleaning and etching the concrete and mixing the epoxy correctly.
Cleaning and Etching the Concrete
First, clean and etch the concrete surface. This step is vital for the epoxy to stick well. Start by sweeping to remove loose debris. Then, use a degreaser to get rid of oil or grease stains.
After cleaning, apply an etching solution. This will make the surface rough. The epoxy can then grip onto it better.
Mixing the Epoxy
Epoxy coatings are made of two parts: resin and hardener. Always follow the manufacturer’s mixing instructions. Mixing well ensures an even application.
Proper mixing helps the epoxy cure right. This creates a strong, durable finish.
By cleaning, etching, and mixing the epoxy right, you’re ready for a successful application. You’ll get a long-lasting, high-quality epoxy garage floor.
How to Epoxy Garage Floor: The Application Process
Turning your garage floor into a durable, professional-looking surface starts with the right epoxy application. Whether you’re how to epoxy garage floor or applying epoxy garage floor, this guide will help you get a perfect finish.
First, make sure your garage floor is clean and etched. This step is crucial for the epoxy to bond well. After prepping, mix the epoxy as the manufacturer says.
- Pour the epoxy resin and hardener into a clean mixing container.
- Use a low-speed drill with a mixing paddle to blend the components until the mixture is smooth and uniform.
- Immediately pour the mixed epoxy onto the floor, starting in the corners and working your way outward.
- Use a notched squeegee or roller to spread the epoxy evenly across the surface, ensuring complete coverage.
For a seamless finish, work in sections and keep a “wet edge.” This avoids lines or overlaps. Watch the epoxy’s pot life, as it hardens fast after mixing.
| Tool | Purpose |
|---|---|
| Notched Squeegee | Evenly distributes the epoxy across the floor |
| Roller | Helps smooth out the epoxy and eliminate air bubbles |
| Low-speed Drill with Mixing Paddle | Thoroughly blends the epoxy resin and hardener |
By following these steps for how to epoxy garage floor and applying epoxy garage floor, you’ll get a flawless, durable finish. This will change your garage’s look and function.
Decorative Options for Epoxy Floors
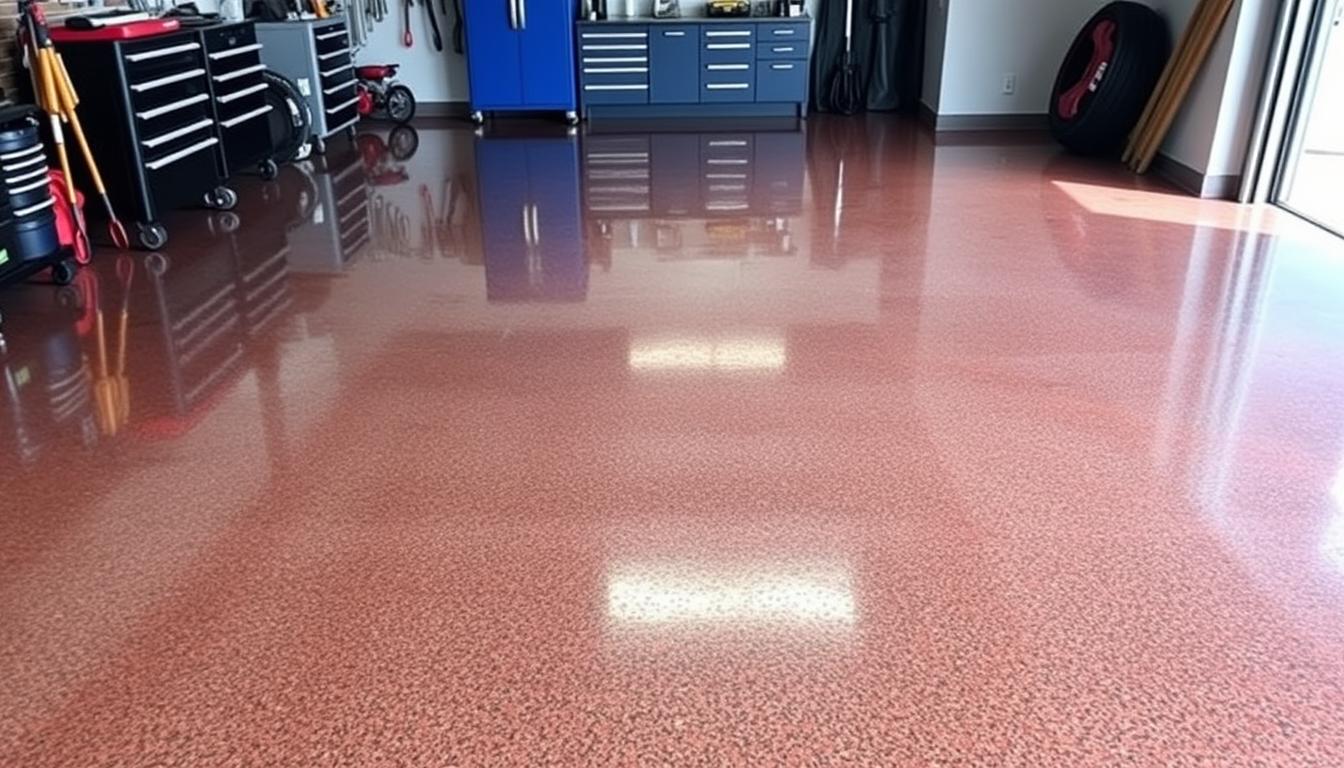
Epoxy garage floors offer endless customization options. You can choose from a wide range of epoxy garage floor colors or add decorative flakes or chips. This way, your garage floor can truly reflect your unique style.
Epoxy Garage Floor Colors
Epoxy flooring comes in a vast array of colors. You can pick from sleek, subtle tones or bold, eye-catching hues. Popular choices include classic grays, warm tans, and striking blues or reds. The color you choose can greatly enhance your garage’s look, so explore the many options to find the perfect one.
Adding Flakes or Chips to Epoxy
- Adding flakes or decorative chips to the epoxy mixture can add visual interest.
- These small, colored particles create a speckled effect, adding depth and dimension to your floor.
- Flakes and chips come in various colors, allowing you to match or contrast with your epoxy color.
Whether you choose a solid color or a flake-infused epoxy, the result is a durable, stunning floor. With so many options, customizing your epoxy garage floor is limitless.

“The beauty of epoxy flooring lies in its ability to transform a simple concrete surface into a work of art.”
Curing and Sealing the Epoxy Coating
Proper curing and sealing of the epoxy coating are key to a durable garage floor finish. The curing process lets the epoxy harden fully. It also makes it strong and resilient. Sealing the surface protects it from damage and wear.
The Curing Process
Epoxy coatings need time to cure, usually 24 to 72 hours. This depends on the product and the environment. It’s important to keep the surface clear of foot traffic and heavy objects during this time. This ensures the epoxy reaches its full hardness and strength.
Sealing the Epoxy Coating
After curing, apply a sealing coat. This clear layer of polyurethane or sealant protects the epoxy. It shields against:
- Abrasion and scratches
- Chemical spills and stains
- Ultraviolet (UV) light exposure
- General wear and tear
The sealing process boosts the curing and sealing epoxy garage floor finish. It makes the floor more durable and easier to keep up over time.
By following the right curing and sealing steps, your epoxy garage floor will stay in great shape for years. It will have a professional and lasting finish for your space.
Maintaining Your Epoxy Garage Floor
Keeping your epoxy garage floor looking great is crucial. It ensures the floor stays beautiful for a long time. By following simple cleaning and care tips, your epoxy floor will remain in top shape.
Cleaning and Care Tips
Proper care is essential for maintaining epoxy garage floor. Here are some effective cleaning and care tips:
- Regularly sweep or vacuum the floor to remove dirt, debris, and dust.
- Damp mop the floor using a pH-neutral floor cleaner or a mild soap and water solution.
- Avoid using harsh chemicals, abrasive cleaners, or acidic products, as they can damage the epoxy coating.
- Promptly clean up any spills or stains to prevent them from setting into the floor.
- Protect the floor from heavy impacts or dragging by using furniture pads or area rugs in high-traffic zones.
- Reseal the epoxy coating every few years to maintain its protective properties and prevent wear and tear.
By following these cleaning and care tips, your epoxy garage floor will stay in excellent condition. This will keep its attractive and durable finish for years.
“Proper maintenance is the key to keeping your epoxy garage floor looking its best for years to come.”
Cost of Epoxying a Garage Floor
Epoxy is a popular choice for garage floors because it’s durable. But, the cost can change a lot based on different factors. We’ll look at what affects the price so you can plan your project better.
Epoxy Garage Floor Cost Factors
Several things can change the cost of an epoxy garage floor. Here are some key ones:
- Garage Size – The bigger your garage, the more materials and work it needs. This makes the price go up.
- Epoxy Type – The kind of epoxy you pick can also affect the price. Better, multi-part epoxies cost more than single-part ones.
- Surface Preparation – Getting your floor ready for epoxy is crucial. Cleaning, grinding, and etching add to the cost.
- Labor Costs – If you hire a pro, their work will add to the price. Doing it yourself can save money but takes more time and effort.
- Additional Features – Adding things like flakes or custom colors can make your floor more expensive.
| Epoxy Garage Floor Cost Factor | Cost Range |
|---|---|
| Garage Size (per square foot) | $3 – $12 |
| Epoxy Type (per gallon) | $30 – $100 |
| Surface Preparation (per square foot) | $1 – $3 |
| Labor Costs (per square foot) | $3 – $8 |
| Decorative Elements (per square foot) | $1 – $3 |
Remember, these prices are just estimates. They can change based on where you are, the products and services you choose, and how complex your project is. Talking to local epoxy floor experts can give you a better idea of what to expect.

DIY vs. Professional Installation
Choosing between DIY and professional epoxy garage floor installation is a big decision. Both options have their benefits and things to consider.
The DIY Epoxy Garage Floor Advantage
If you enjoy DIY projects, doing your garage floor yourself can save money. You’ll also get the joy of finishing it yourself. But, you need to prepare the surface well, pick the right products, and apply them correctly for a lasting finish.
Benefits of Professional Epoxy Installation
Going for professional epoxy installation has its perks. Experts bring experience, the right tools, and know-how for a perfect finish. They also help with prep work and offer a warranty. Though it costs more upfront, the quality and peace of mind are worth it for many.
| DIY Epoxy Garage Floor | Professional Epoxy Garage Floor Installation |
|---|---|
|
|
Deciding between DIY and professional installation depends on your budget, time, and comfort with the project. Think about the pros and cons to choose the best option for you.
Troubleshooting Common Epoxy Floor Issues
Even the best epoxy garage floors can face problems. As a homeowner, knowing these issues and how to fix them is key. We’ll look at common epoxy floor problems and offer solutions to keep your floor looking great.
Peeling or Delamination
Peeling or delamination on your epoxy floor might mean bad surface prep, contamination, or wrong substrate. Clean and etch the concrete well to fix this. If it still peels, you might need a pro to check and fix it.
Bubbling or Blistering
Bubbles or blisters can come from air, too much moisture, or bad epoxy mixing. Mix the epoxy right and apply it thin and even. If bubbles show up, use a razor or heat gun to fix them, then reapply.
Discoloration or Yellowing
Discoloration or yellowing can happen, especially with sunlight or harsh cleaners. Use a UV-resistant epoxy and avoid harsh cleaners. If it happens, you might need to reapply the epoxy.
Knowing how to tackle these common issues can keep your garage floor looking good for years.
Conclusion
Changing your garage floor to a durable, professional epoxy garage floor can greatly improve your space. This guide shows you how to get a perfect epoxy garage floor that lasts. You can do it yourself or hire a pro, and the results are worth it.
An epoxy garage floor makes your garage look better and protects your concrete. It’s durable, easy to care for, and comes in many styles. This makes your garage more useful and attractive, adding value to your home.
Starting your garage makeover with an epoxy garage floor requires careful planning. Make sure to prepare well, choose the right products, and apply them carefully. This article will help you get a top-notch finish that will last. Enjoy the benefits of an epoxy garage floor and see how it changes your home.