Keeping your garage door sealed is key for a comfy and energy-saving home. The right weather strip stops drafts, keeps pests out, and guards against weather. This guide will show you how to install garage door weather strip for a tight seal that lasts.
Key Takeaways
- Properly installing garage door weather strip can help improve energy efficiency, prevent drafts, and keep out pests.
- Measure the dimensions of your garage door to ensure you purchase the right size and type of weather strip.
- Clean the surface of the garage door before installation to ensure a secure bond.
- Follow the step-by-step instructions for installing the top, side, and bottom weather strips.
- Regularly maintain and replace the weather strip as needed to keep your garage door properly sealed.
Introduction to Garage Door Weather Stripping
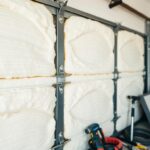
Keeping your home comfortable and energy-efficient starts with a sealed garage door. Weather stripping is key to this. It helps block drafts, keeps pests out, and boosts your garage’s insulation. We’ll look at the benefits and types of weather stripping for your garage door.
Benefits of Installing Weather Stripping
High-quality weather stripping brings many benefits. It makes your home more comfortable and efficient. Key advantages include:
- Less drafts and air leaks, keeping your garage and connected areas cozy all year
- Better insulation, which can cut down on energy bills and make your home more energy-smart
- Stronger pest control, as it blocks small rodents and insects from getting into your garage
- More security, as it seals gaps and cracks that could be used by intruders
Types of Garage Door Weather Stripping
There are many types of garage door weather stripping, each with its own benefits. The most common ones are:
- Rubber Weather Stripping: It’s durable and flexible, making a great seal against drafts and pests.
- Vinyl Weather Stripping: It’s affordable, easy to put in, and insulates well.
- Foam Weather Stripping: It’s light and can fill gaps and uneven spots.
Choosing the right weather stripping depends on your garage door’s material, the size of gaps, and your budget. Talking to a pro can help you pick the best one and ensure it’s installed right.
Tools and Materials Needed
Installing garage door weather stripping needs the right tools and materials. Having the correct equipment is key for a successful project. This section lists everything you’ll need, from measuring tools to weather stripping and adhesives.
For tools and materials needed for garage door weather stripping, you’ll need:
- Measuring tape or ruler
- Utility knife or scissors
- Caulk gun (if using adhesive-backed weather stripping)
- Hammer or nail gun (if using nailed-on weather stripping)
- Screwdriver or drill (for securing weather stripping)
- Cleaning cloth or rag
- Degreaser or cleaner (to prepare the door surface)
You’ll also need the right garage door weather stripping for your door. This includes:
- Adhesive-backed weather stripping (for the top and sides of the door)
- Nailed-on weather stripping (for the top and sides of the door)
- Bottom seal weather stripping (for the bottom of the door)
Depending on your choice, you might need adhesive or fasteners to hold the stripping in place.
With these tools and materials ready, you’re set for your garage door weather stripping project. You’ll get a tight, energy-saving seal for your home.
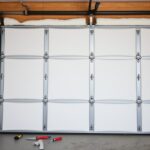
Preparing the Garage Door for Installation
Before you start installing weather stripping on your garage door, you need to prepare the surface. This involves a few key steps. These steps help the weather stripping stick well and seal effectively.
Cleaning the Surface
The first step is to clean the area where you’ll apply the weather stripping. How to clean garage door for weather stripping means removing dirt, debris, or old sealant. Use a degreaser or mild detergent and a clean cloth to wipe down the surface. Make sure to clean corners and edges well.
Measuring the Door’s Dimensions
Then, measure your garage door’s dimensions to find the right weather stripping size. How to measure garage door for weather stripping is crucial for a good fit. Measure the door’s width, height, and thickness. This ensures you pick the right weather stripping for a tight seal.
By carefully preparing the garage door for weather stripping, you’re setting up for a successful installation. This will also make your home more energy-efficient.
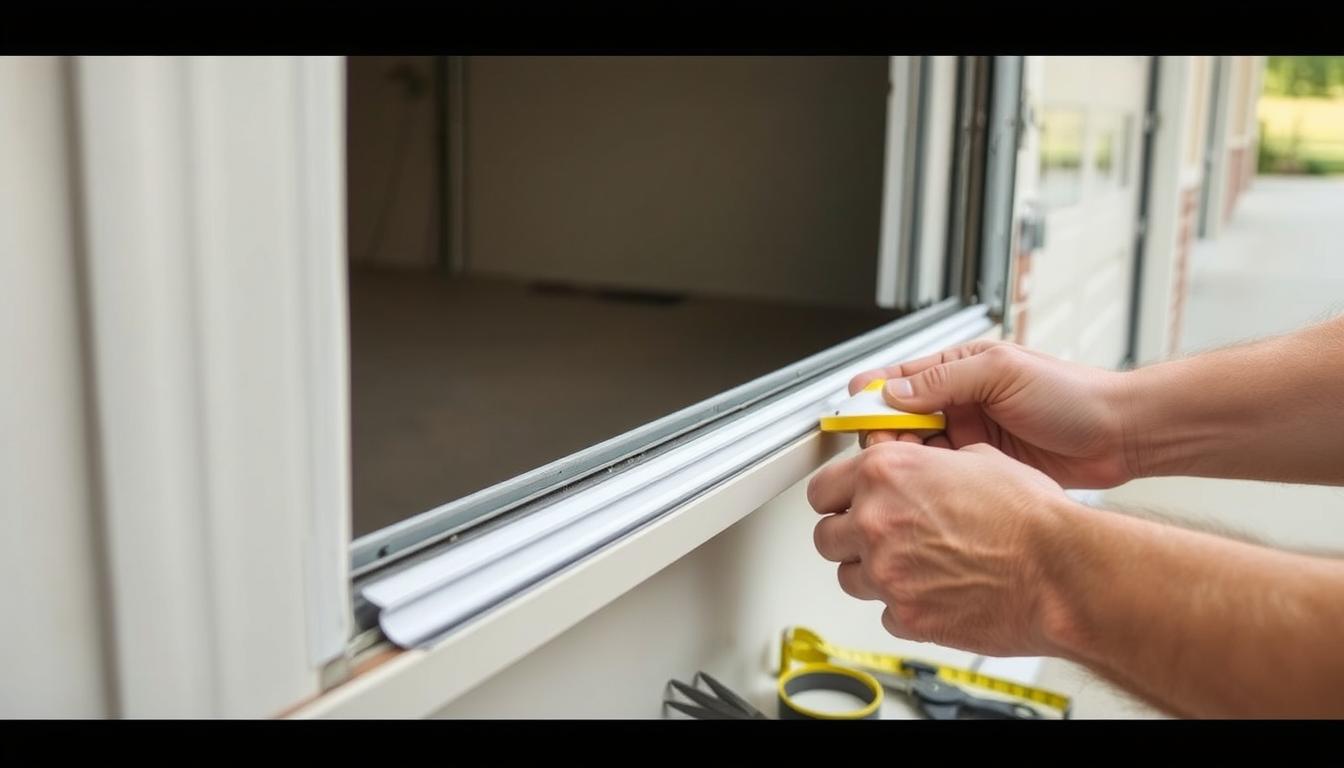
Installing the Top and Side Weather Strips
Installing weather stripping on your garage door’s top and sides is key for a tight seal. You need to measure, cut, and secure it properly. Let’s explore how to do it right.
Begin by measuring the top and sides of your garage door. This will tell you how much weather stripping you need. Make sure to measure each part separately, as they might be different. After getting your measurements, cut the weather stripping to fit using a sharp knife or scissors.
- Clean the area where you’ll put the weather stripping. This helps the adhesive or fasteners stick better.
- Put the top weather stripping on first, pressing it firmly along the door’s header. Make sure it seals tightly without gaps.
- For the sides, start at the top of the door frame and go down, pressing the stripping against the edges.
- Use the right fasteners, like clips or adhesive, to hold the weather stripping in place. Follow the manufacturer’s guide.
- Check your work to make sure the weather stripping is straight and seals well along the top and sides.
By following these steps, you can install garage door weather stripping effectively. This will help your garage stay tighter and more energy-efficient. Take your time and check your work to ensure the garage door weather stripping installation is correct.
“A well-installed weather stripping can make a significant difference in your home’s energy efficiency and comfort.”
Garage Door Seal Strip
The garage door seal strip, also known as the garage door bottom seal, is key to a tight seal at the bottom of your garage door. It keeps drafts out, pests away, and the garage temperature steady. Knowing how to measure, cut, and attach the seal is crucial, whether it’s for a new installation or a replacement.
Measuring and Cutting the Bottom Seal Strip
First, measure the width of your garage door opening. This will tell you how long the garage door seal strip needs to be. Measure from one side to the other, including any extra for overlap or gaps. Then, buy a garage door bottom seal strip that fits your door’s width.
Next, cut the garage door bottom seal strip to the right size. Use a sharp knife or scissors for a clean cut. A straight cut is vital for a good fit at the bottom of your garage door.
Attaching the Bottom Seal Strip
Now that your seal strip is cut, it’s time to install it. Clean the bottom of your garage door first. Remove dirt, debris, or old sealant. This ensures the new how to install garage door bottom seal strip sticks well.
- Place the seal strip along the door’s bottom, making sure it fits snugly.
- Remove the adhesive backing and press the strip firmly onto the door, starting from one end.
- For extra security, use screws or nails to hold the how to cut garage door bottom seal strip in place.
By following these steps, you can easily install a new garage door seal strip. This will seal your garage door properly and keep it weatherproof.
Checking for Proper Sealing
After installing weather stripping on your garage door, it’s important to check if it’s sealing well. Good sealing keeps your home energy-efficient and safe from the weather. Here’s how to check the weather stripping seal on your garage door:
- Visually Inspect the Seals: Look closely at the weather stripping for gaps, cracks, or spaces. These can let air, water, and pests into your garage.
- Perform a Hands-On Test: Run your hands along the weather stripping to feel for any issues. This can show you where the seal might need fixing.
- Conduct a Lighting Test: Turn off the garage lights and have someone outside shine a flashlight along the weather stripping. Light gaps mean the seal isn’t working right.
- Check the Door’s Movement: Watch how the door moves when you open and close it. If the weather stripping catches or rubs, it might need adjusting or replacing.
By carefully checking the how to check garage door weather stripping seal, you can make sure your garage door is sealed well. If you find any problems, fix or replace the weather stripping to keep your garage sealed and secure.
“Proper weather stripping is crucial for maintaining the energy efficiency and protecting your home from the elements.”

Maintenance and Care
Keeping your garage door weather stripping in good shape is crucial. Regular cleaning and care can make your weather seals last longer. This ensures they keep your garage safe from the weather. Here’s how to maintain your how to maintain garage door weather stripping effectively.
Cleaning the Weather Stripping
To clean your how to clean garage door weather stripping, start with a damp cloth. This removes dirt, debris, and grime that builds up. For tough stains, use a mild soap and water solution. Make sure to rinse well and dry the weather stripping before closing the door.
- Wipe down the weather stripping with a damp cloth to remove dirt and debris.
- For stubborn stains, use a mild soap and water solution, then rinse and dry thoroughly.
- Avoid using harsh chemicals or abrasive cleaners, as they can damage the weather stripping material.
Also, apply a silicone-based lubricant to the weather stripping. This keeps it flexible and prevents cracking. It ensures your garage door stays sealed tightly.
| Maintenance Task | Frequency |
|---|---|
| Cleaning the weather stripping | Every 6 months |
| Applying silicone-based lubricant | Annually |
By following these simple steps, you can extend your garage door weather stripping’s life. Regular inspections and quick fixes help keep your garage door working well. Always check the seals and fix any problems to keep your garage safe.
Tips and Tricks for Installation
Installing garage door weather stripping can be easier with some preparation and attention to detail. We’ve gathered a list of tips and tricks to help you. These will make the process smoother and more efficient.
First, measure twice, cut once. It’s important to measure your garage door accurately. This ensures the weather stripping fits perfectly. Double-check your measurements before cutting the strips.
- Start with a clean surface. Clean the door frame and any old weather stripping well. This helps the new strips stick better and seal tighter.
- Use a rubber mallet or roller to press the weather stripping firmly into place. This creates a strong bond with the door frame.
- For the bottom seal, use silicone-based sealant to improve weatherproofing. Apply a thin bead along the seal before pressing it into place.
- When cutting the weather stripping, leave a slight overlap at the corners. This prevents gaps and ensures a complete seal around the door.
- If you find gaps or spaces after installation, use a small amount of caulk to fill them. This creates a seamless barrier.
By following these tips for installing garage door weather stripping, you can get a professional-looking, long-lasting result. This will protect your home from the elements effectively.
| Tip | Description |
|---|---|
| Measure Twice, Cut Once | Accurately measure the door dimensions to ensure a proper fit for the weather stripping. |
| Clean the Surface | Thoroughly clean the door frame and existing weather stripping before installation. |
| Use a Mallet or Roller | Firmly press the weather stripping into place using a rubber mallet or roller. |
| Seal the Bottom | Consider using a silicone-based sealant for the bottom seal strip to enhance weatherproofing. |
| Overlap the Corners | Leave a slight overlap at the corners when cutting the weather stripping to size. |
| Fill Gaps with Caulk | Use caulk to fill any gaps or spaces after the installation is complete. |
By following these tricks for installing garage door weather stripping, you can ensure a professional, long-lasting result. This will effectively protect your home from the elements.

“Taking the time to properly install garage door weather stripping can make a significant difference in the energy efficiency and comfort of your home.”
When to Replace the Weather Stripping
Garage door weather stripping is made to handle the weather, but it won’t last forever. Over time, it can crack, become brittle, or wear down. This makes it less effective at sealing the door and keeping your home safe from the outside.
Signs of Wear and Tear
It’s important to check your garage door weather stripping regularly. Look for cracks, gaps, or a hard, stiff texture. If the seal is loose or doesn’t fit the door frame well, it’s time to replace it. Also, if you see a lot of wear on the bottom seal or feel drafts in your garage, it’s a sign it needs to be replaced.
Weather stripping can last several years if you take care of it. But, how long it lasts depends on the material, the weather, and how often you use it. By keeping an eye on it and fixing problems quickly, you can keep your garage door sealed and energy-efficient for a long time.