Keeping your garage comfortable and energy-efficient is key. Installing weather stripping on your garage door is a great way to do this. It seals gaps and cracks, stopping drafts and improving insulation. This guide will show you how to install weather stripping correctly. You’ll enjoy a more comfortable and cost-effective garage.
Key Takeaways
- Weather stripping helps seal gaps and cracks around the garage door, improving energy efficiency and comfort
- There are different types of weather stripping, including vinyl and rubber, each with its own benefits
- Proper preparation, including cleaning and measuring, is essential for a successful installation
- Following a step-by-step guide can ensure a professional-looking and effective weather stripping installation
- Regular maintenance and replacement of weather stripping can help maximize its lifespan and effectiveness
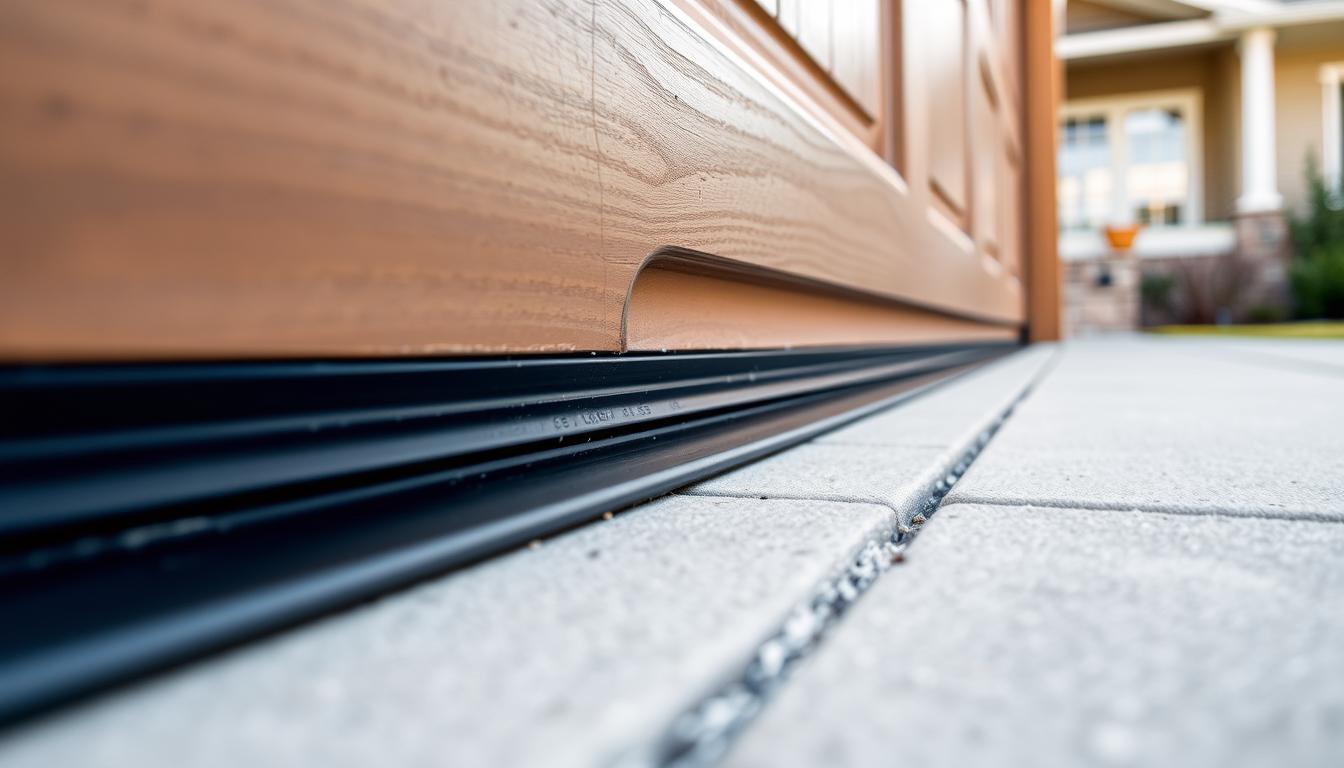
The Importance of Garage Door Weather Stripping
Garage door weather stripping is key to keeping your home efficient and comfortable. It seals the garage door’s edges, stopping drafts, pests, and weather from getting in. This simple addition can greatly improve your home’s comfort and save on energy costs.
One big reason garage door weather stripping importance is huge is its energy-saving benefits. It blocks air leaks, which cuts down on heating and cooling costs. This means lower bills and a greener home.
Another plus of the benefits of garage door weather stripping is keeping your home’s climate just right. It keeps the garage’s temperature steady, making it more comfortable all year. This also helps protect your stuff from too much moisture or temperature changes.
Also, why is garage door weather stripping important is clear when you think about pest control. Without it, pests like insects and rodents can sneak in. Weather stripping keeps these pests out, keeping your garage and home clean and safe.
In short, garage door weather stripping is very important. It boosts energy efficiency, keeps your home comfy, and keeps pests out. Getting good weather stripping for your garage is a wise move that will save you money and hassle in the long run.
Types of Garage Door Weather Stripping
There are many types of weather stripping for your garage door. Vinyl and rubber are the most common. Each has its own benefits and features. Knowing the differences can help you choose the right one for your garage and climate.
Vinyl Stripping
Vinyl weather stripping is popular for its durability and affordability. It’s flexible and seals well around your garage door. This keeps drafts, moisture, and pests out. It comes in many colors to match your garage and is easy to install, perfect for DIY projects.
Rubber Stripping
Rubber weather stripping offers better insulation. It keeps your garage door airtight and protects against temperature changes. It’s flexible and fits your garage door well. Though it costs more, its durability makes it a good investment for top-notch weather protection.
| Feature | Vinyl Stripping | Rubber Stripping |
|---|---|---|
| Durability | Moderate | High |
| Insulation | Good | Excellent |
| Flexibility | Moderate | High |
| Cost | Low | Moderate to High |
| Installation Difficulty | Easy | Moderate |
Choosing the right garage door weather stripping depends on your needs. Vinyl and rubber offer different benefits. By understanding these, you can pick the best for your garage door’s protection.
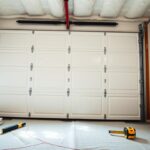
Preparing for Installation
Before you start installing garage door weather stripping, gather your tools and materials. This preparation makes the installation smooth and successful. It saves you time and effort.
Tools and Materials Needed
To install garage door weather stripping, you’ll need:
- Garage door weather stripping (choose the right type for your door)
- Measuring tape or ruler
- Utility knife or scissors
- Adhesive (like caulk or weather-resistant sealant)
- Cleaning supplies (degreaser, rags, etc.) to clean the door
- Screwdriver or drill (for screws or nails)
Make sure you have everything before you start. This helps you work efficiently and avoid problems.
| Tool/Material | Purpose |
|---|---|
| Garage door weather stripping | The main part for sealing your garage door |
| Measuring tape or ruler | Measure your garage door to cut the weather stripping |
| Utility knife or scissors | Trim the weather stripping to fit your door |
| Adhesive | Attach the weather stripping to the door |
| Cleaning supplies | Get the door ready for the weather stripping |
| Screwdriver or drill | Secure the weather stripping with screws or nails |
With the right tools and materials, you’re ready to install garage door weather stripping confidently.
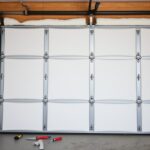
Step-by-Step Guide for Installing Weather Stripping
Installing garage door weather stripping right is key to keeping your home tight and saving energy. Here’s a detailed guide to help you install weather stripping successfully:
- Measure the Garage Door: First, measure your garage door’s edges to figure out how much weather stripping you need. Take note of the top, sides, and bottom, and any special shapes or angles.
- Clean the Door: Clean the spots where you’ll put the weather stripping before you start. This helps the adhesive stick better.
- Cut the Stripping to Size: Cut the weather stripping to the right lengths based on your measurements. Make sure to have a bit extra at the corners for a tighter seal.
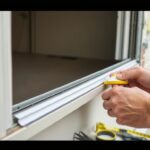
- Apply the Stripping: Peel off the backing and press the weather stripping firmly into place, starting at the top. Work your way down, applying even pressure for a secure fit.
- Seal the Corners: For extra protection, use a bit of silicone sealant on the corners where the weather stripping meets.
By following these step-by-step instructions for installing garage door weather stripping, you’ll get a tight, lasting seal. This will keep your home cozy and save energy.

“Proper installation of garage door weather stripping can make a significant difference in your home’s energy efficiency and comfort levels.”
Troubleshooting Common Issues
Even the best garage door weather stripping can face problems. Gaps, cracks, and wear are common issues. But, with the right steps, you can fix these problems quickly.
Addressing Gaps and Cracks
Gaps or cracks often come from bad installation or environmental damage. First, check the weather stripping for any loose parts. Push it back into place, making sure it sticks well to the garage door.
If the problem doesn’t go away, you might need a new section. Remove the damaged part and measure for the right replacement. Use a strong adhesive on the frame and press the new piece firmly into place.
Dealing with Premature Wear
Weather stripping is made to last, but it can wear out. If it’s breaking down faster, check if the environment is causing it. Extreme temperatures, UV rays, and moisture can damage it.
- Extreme temperatures, UV exposure, and moisture can all accelerate the breakdown of the material.
- Ensure the stripping is properly sealed and protected from the elements as much as possible.
- Consider upgrading to a more durable weather stripping option, such as silicone or EPDM rubber, for improved longevity.
By fixing these common garage door weather stripping problems, you can keep your garage door sealed and energy-efficient. A little fixing issues with garage door weather stripping will make your garage door work smoothly again.
Garage Door Weather Stripping
Garage door weather stripping is key to keeping your garage comfy and energy-efficient. It seals gaps around the door, stopping drafts and saving on energy. Knowing the types of garage door weather stripping helps you choose the best for your home.
Vinyl is a top pick for garage door weather stripping. It’s tough, bends easily, and holds up to weather. It seals well, keeping your garage’s temperature steady.
Rubber weather stripping is also popular. It insulates better than vinyl, making a tighter seal. It’s great for places with extreme weather, as it doesn’t crack or wear out fast.
| Type of Garage Door Weather Stripping | Key Features |
|---|---|
| Vinyl Stripping | Durable, flexible, and weather-resistant |
| Rubber Stripping | Excellent insulating properties, resistant to cracking and deterioration |
Choosing the best garage door weather stripping depends on your garage’s size and your area’s climate. Talking to a pro can help pick the right one for you.
Quality garage door weather stripping makes your garage cozy and saves energy. It boosts your home’s value and livability.
Maintenance and Replacement Tips
Keeping your garage door weather stripping in good shape is key. Regular cleaning and inspection can spot problems early. This helps your seals last longer.
Cleaning and Inspection
To clean garage door weather stripping, mix mild soap with water. Gently scrub it to get rid of dirt. Don’t use harsh chemicals or rough cleaners, as they can harm the material. After cleaning, make sure it’s dry before closing the garage door.
Check the weather stripping often for wear signs like cracks or tears. If it’s damaged or doesn’t seal well, replace it.
| Maintenance Task | Frequency |
|---|---|
| Cleaning | Every 6 months |
| Inspection | Every 3-6 months |
| Replacement | As needed, typically every 3-5 years |
By sticking to these garage door weather stripping maintenance tips, your seals will keep working well. This helps keep your home energy-efficient and secure.
Cost Considerations
The cost of installing weather stripping on your garage door varies. The cost of garage door weather stripping can range from $10 to $50 or more. This depends on the type and size of your garage door.
The average cost to install garage door weather stripping also depends on the installation process. DIY installation is cheaper, but a professional ensures a proper fit. This can save money in the long run.
Several factors affecting garage door weather stripping cost include:
- Garage door size: Larger doors need more weather stripping and cost more.
- Type of weather stripping: Vinyl and rubber have different prices.
- Labor costs: DIY is cheaper than hiring a pro.
- Existing door condition: Damaged doors need extra work.
- Regional pricing: Costs vary by location.
| Factor | Estimated Cost Range |
|---|---|
| Weather Stripping Material | $10 – $50 |
| DIY Installation | $0 – $30 |
| Professional Installation | $50 – $200 |
Understanding these factors affecting garage door weather stripping cost helps estimate the total cost. This ensures your garage door is energy-efficient and protected.

“Proper weather sealing can make a significant difference in your home’s energy efficiency and comfort.”
Conclusion
This guide has covered the key steps for installing weather stripping on your garage door. It shows how important weather stripping is for your garage door’s energy efficiency and protection. By following the instructions, you can make your garage door last longer.
The main points are to pick the right weather stripping, get your garage door ready, and install it carefully. Keeping it in good shape and replacing it when needed is also important. This keeps your home safe from the weather.
Choosing good weather stripping is a smart move for your home’s energy use and comfort. By using the tips from this guide, your garage door will stay sealed and efficient for many years.